


Contents
Introduction Cutscene
Introduction cutscene can be seen here.
Power
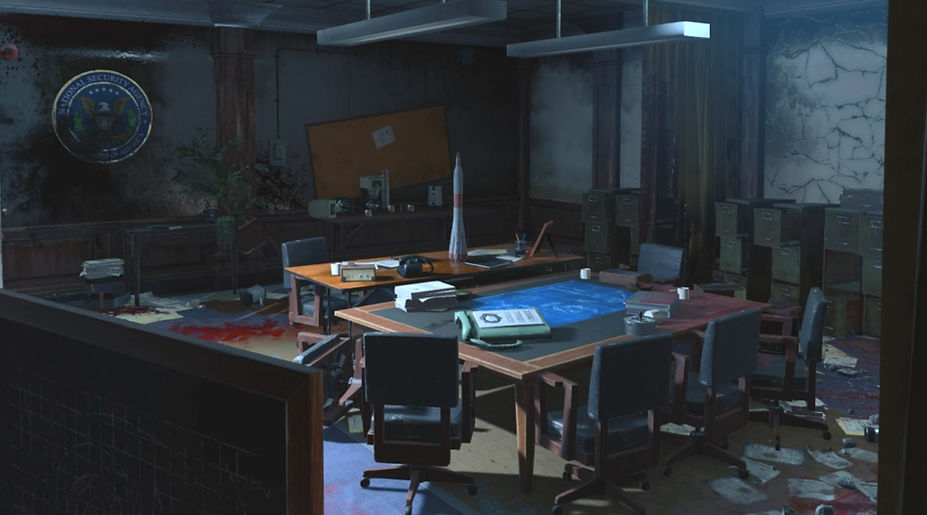
There are multiple floor levels to the map, being top floor (Conference Room), 2nd floor (War Room) and the bottom floor (the Labs). The Power Switch on the map is located down in the 'Labs' area.
If you require a video guide then the video below will show you how to turn on the Power.
This video is provided by JokerAlex 21.
Pack a Punch
To access the Pack a Punch machine on the map the player will need to craft the Teleporter Signal Amplifier. There are 3 parts to obtain and all 3 spawn in the same areas but locations will randomise each game.
The 1st part can be found upstairs in the 'Main Offices' in the room with the Brew Perk Machine. It can be found either under a desk near the zombie barrier, in the middle of the room on top of a turned over desk, or, if facing the Brew Perk Machine, to the left of it in the corner of the desk next to the zombie barrier.
The 2nd part can be obtained by activating all 4 of the Defcon switches in the 'War Room and Server Room'. Once this is done the player will need to head down to the centre of the room, to a portal that shows a picture of George Washington in it and walk into it. This will then teleport the player to the 'Panic Room' and once inside the room the wall at the end will have the part laying on the floor in front of it.
The 3rd part can be found downstairs in the 'Morgue'. It can be found either:
- on the metal desk, next to one of the exits and window for the small office room,
- on top of one of the left containers with the dead body in it,
- in the small office room on the chair next to the desk.
Once the player has all the parts they will need to craft the Teleporter Signal Amplifier. This can be built on any of the 2 workbenches in the map. These are located in the 'Central Filing' room or in the 'Weapon Testing' room.
Once the Teleporter Signal Amplifier is built, the player needs to take this to the 'War Room' and place it down on the teleporter in the centre of the room. This will then move the teleporter to the floor map in the middle of the room. The player then needs to re-activate all the Defcon switches once again and this time, when walking over to the teleporter in the centre of the room they will see a picture of the Pack a Punch. Once the player walks into the teleporter they will spawn in at 'Groom Lake' where they can then Pack a Punch their weapons. Once they leave 'Groom Lake' if they wish to return to Pack a Punch again they will need to re activate all the Defcon switches again and then teleport to 'Groom Lake' once again.
If you require a video guide then the video below will show you how to build the Teleporter Signal Amplifier and how to access the Pack a Punch machine.
This video is provided by JokerAlex 21.
Shield
The player can craft the Shield to help protect themselves. There are 3 parts to obtain and all 3 spawn in the same areas but locations will randomise each game.
The 1st part can be found in 'Central Filing' room. It can be found either:
-
up against the wall next to the metal detector doorway leaning up against the wall.
-
in the centre of the room leaning next to the filing cabinets with the vodka bottle for the music Easter Egg on top of them.
-
next to the left of the doorway that leads out into the 'Mail Offices', leaning up against the wall with the windows.
The 2nd part can be found in 'War Room: Lower Level'. It can be either:
-
in the corner of the room leaning up against a terminal next to the zombie barrier and vodka bottle for the music Easter Egg,
-
leaning up against the railing in the centre of the room with the yellow map on the floor,
-
on the other side of the room at the bottom right of the staircase.
The 3rd part can be found in the 'Labs'. It can be:
-
in the Power Switch room leaning up against a cardboard box to the left of the Power Switch,
-
just outside of the 'Weapon Testing' room leaning up against the wall next to the doorway that leads to the 'Weapon Testing' room and next to the teleporter,
-
Over in the 'North Laboratories' area next to the zombie barrier leaning up against a Nova 6 container.
Once the player has all the parts they can then craft the Shield. This can be built on any of the 2 workbenches in the map. These are located in the 'Central Filing' room or in the 'Weapon Testing' room.
Once the player has crafted the Shield they can use it in the following ways.
-
the Shield can be kept at the players back, protecting them from being hit from behind.
-
it can be pulled out in front of them and used to bash the zombies. With the Shield pulled out in front they can also use the pistol that comes with the Shield to shoot zombies.
If the shield breaks the player will need to come back to the workbench where they built the Shield and purchase another one. They can also return to the workbench and repair the Shield they already have. If the player picks up a Carpenter power-up this will fully repair their Shield.
If you require a video guide then the video below will show you how to build the Shield and how to use it.
This video is provided by JokerAlex 21.
Electric Traps
The player can fix the Electric Traps to help protect themselves from Zombies, Nova Crawlers and Hellhounds. There are 2 parts to obtain and both spawn in the same areas but locations will randomise each game.
The 1st trap part can be found in the 'Server Room'. It can be found either:
-
to the right of the doorway leaning next to a terminal near a Mystery Box spawn locatiion,
-
over by the Defcon switch underneath the centre terminal,
-
at the back of the room in between 2 terminal machines on a trolley next to the teleporter.
The 2nd part can be found in the 'Porcine Research' room. It can be either:
-
to the right of the doorway in a cage.
-
on the 2nd shelf of the metal desk to the left of the Tonic Machine,
-
to the left of the taped up door in a filing cabinet next to the zombie barrier.
Once the player has both Electric Trap parts they will need to insert them into the metal detectors in the 'Side Passageway and the 'Deserted Hallway'. The player can then activate these for 1000 points to electrify the enemies and kill them.
If you require a video guide then the video below will show you how to fix the Electric Traps.
This video is provided by JokerAlex 21.
How to Activate Music Easter Egg
'Shockwave'
To activate the song 'Shockwave' by Kevin Sherwood on Classified, the player will need to find and interact with 3
Vodka Bottles located around the map. They can be found in the following areas.
1st Vodka Bottle can be found in the 'Central Filing' room on top of the filing cabinets in the middle of the room next to the giant glass window with the zombie barrier.
2nd Vodka Bottle can be found in the 'War Room: Lower Level' on the right hand side of the room underneath a terminal by the zombie barrier in the right hand corner of the room.
3rd Vodka Bottle can be found in the 'Porcine Research' room on the 2nd shelf of the metal desk next to the door with the tape over it.
The song can only be played once per game.
If you require a video guide then the video below will show you how to activate the song 'Shockwave'.
This video is provided by JokerAlex 21.
How to Activate Music Easter Egg
'This Jazz is Classified (Intro Music)'
To activate the song 'This Jazz is Classified' by Jack Wall on Classified the player will need to turn on the Power and then interact with 5 terminals in a specific sequence in the 'War Room: Lower Level'. Once done the song will begin to play.
The song can only be played once per game.
If you require a video guide then the video below will show you how to activate the song 'This Jazz is Classified'.
This video is provided by JokerAlex 21.
Primis Nikolai Portrait
There is a hidden portrait Easter Egg on the map. To activate this the player must buy the Bowie Knife which can be found in the 'Weapons Testing' room.
After that the player will need to head upstairs and knife 5 wonky portraits on the wall to straighten them. One can be found in the 'Deserted Hallway', one can be found in the 'Conference Room', one can be found in the 'Side Passage', one can be found in the 'Central Filing' room and the last one can be found in the 'Main Offices'. Once all are knifed with the Bowie Knife a sound queue will play.
The player will then need to head to the 'War Room' and activate all the Defcon switches. If the player has already accessed the Pack a Punch area, covered up the centre room teleporter in the 'War Room' and moved it to the middle of the room on the yellow map floor, then they will need to use the teleporter in the 'Server Room' to get back to the 'Panic Room'. Once the player enters the 'Panic Room' they need to head to the small hallway that leads out of the 'Panic Room' where they will see 2 portraits. The player needs to interact with the portrait on the left which is blacked out. Once they do so a picture of Primis Nikolai will take its place and the portrait on the right of Ultimis Richtofen will disappear.
If you require a video guide then the video below will show you how to activate the Primis Nikolai Portrait.
This video is provided by JokerAlex 21.
Jumpscare
There is a small amusing Jumpscare on the map making a nod back to the Last Generation Black Ops III Primis Richtofen.
To activate this the player must have a sniper. Once they have a sniper they will need to have done all the steps for accessing Pack a Punch. Once they do so they will need to teleport to 'Groom Lake' and then, inside the Pack a Punch fencing area when facing the teleporter, head over to the left hand side and aim outside the map at the grate on the radar dish building. Once done, this will activate the Last Gen Richtofen Jumpscare.
This can only be activated once per game and only by one person.
If you require a video guide then the video below will show you how to activate the Last Gen Richtofen Jumpscare.
This video is provided by JokerAlex 21.
Robert Mcnamara Door Quotes
(Nova Crawlers)
There is a wooden door at the back of the 'Mail Offices' room near the Brew Perk Machine. If the player interacts with the door they will hear a quote from Robert Mcnamara. If they keep interacting with the door, eventually Samantha will get angry and start spawning in multiple Nova 6 crawlers.
This is a great way to obtain lots of points to open up the map at the start of the game.
If you require a video guide then the video below will show you how to activate the Robert Mcnamara Door Quotes (Nova Crawlers).
This video is provided by Afterlife.
Samantha on Big Screens
in 'Conference Room' (Spawn)
Once the player has turned on the power, if they head up to the 'Conference Room' (Spawn) they will see where the teleporter is located on the screens around it which show a picture of Samantha's face.

Ascension Rocket
The player can find the Rocket from the map Ascension outside one of the zombie barriers, sitting on the table.
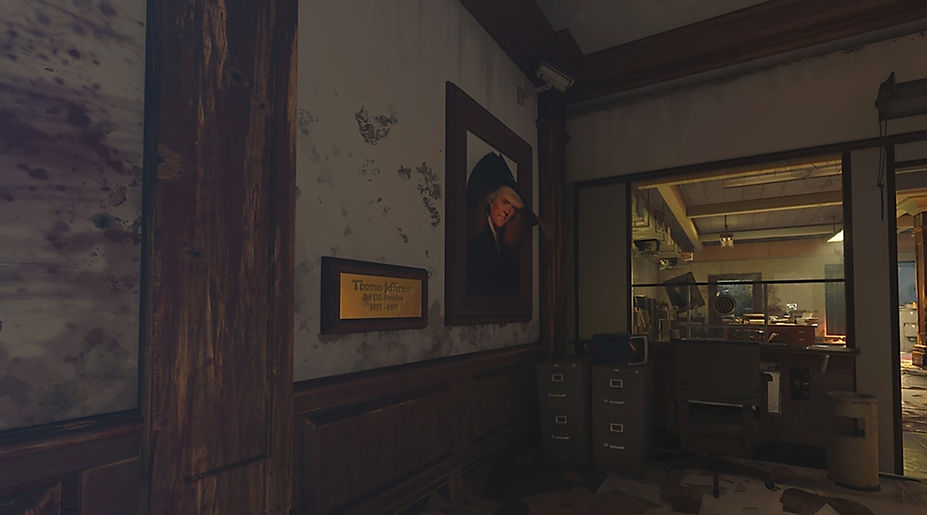
Ultimis Dempsey Portrait
If the player goes to the exit door of the Panic Room and looks through the zombie barrier they will see a portrait of Ultimis Dempsey on the wall.

Samantha Crooked Man
If the player heads down to the 'Labs', goes into the 'Morgue' and crouches in the corner of the room in front of the red lockers for 1 minute, they will hear Samantha doing the Crooked Man rhyme,
If you require a video guide then the video below will show you how to activate the Samantha Crooked Man Rhyme.
This video is provided by JokerAlex 21.
Prototype Teleporter
If the player heads down to the 'Labs' and comes to the zombie barrier outside the 'Weapon Testing' room they will see the first ever teleporter that was built by Maxis at the back of the room.


BO1 Campaign Mission Notice Board
In the 'Conference Room', in the upper area of the room behind some glass, there is a notice board that shows pictures from one of the BO1 campaign missions.
Previous Map Pictures
In the 'Conference Room' and the 'War Room' there are multiple photographs and screens that show a part of multiple previous Call of Duty Zombie maps. The maps include Verruckt, Shi No Numa, Der Riese, Kino der Toten, Ascension and Shangri La.
TV Pictures of Moon and
Samantha's Room
In the 'War Room' there are multiple TVs that show images of the map Moon and of Samantha's Room.
Trollarch Logo
In the Upstairs area of the map, on some of the filing cabinets there is Treyarch's logo - however, it is changed to say Trollarch instead.
This seems to no longer be in the game.

Illuminati Symbol TV
If the player looks at one of the TVs that shows the location of the Mystery Box, then eventually, for a brief moment, the Illuminati symbol will flash onto the screen.

Removing Debris from 'Groom Lake'
If the player travels and remains at 'Groom Lake' (Pack a Punch) for 3 full rounds, then at the end of the round, some of the debris will fly up into the air which will open up more of 'Groom Lake' to move around in and will also spawn Max Ammo and Bonfire Sale power-ups. If the player leaves 'Groom Lake' and then returns and repeats the process once again the same way, then more debris will be removed and once again a Max Ammo and Bonfire Sale power-ups will spawn. This can be repeated until all the debris in 'Groom Lake' is fully removed.
If you require a video guide then the video below will show you how to get a Free Max Ammo and Bonfire Sale power-up multiple times.
This video is provided by JokerAlex 21.
100 Points from Perk Machines
The player can obtain 100 points from each perk machine by laying down in front of them. If in co-op, only the first player who lies down in front of the machine can obtain the 100 points. The machines that the player can lie down in front of are:
Brew
Cola
Soda
Tonic
Pack a Punch Camo Ray Gun
Blueprints and Doctor Porter
When the player Pack a Punches their weapon they will receive a blueprint camo. This camo is either the blueprint for the Ray Gun or a blueprint for the Ray Gun Mark 4 and 5 (which we have never seen as of yet).
Also on the blueprint of the Ray Gun there is an image of Doctor Porter. This is the man who created and made possible the Ray Gun wonder weapon.


Samantha's Face Showing
Moon Easter Egg Events
In the promotional poster art for Classified it shows a demonic version of Samantha. Looking closely at the poster, it shows the main events of the Moon Easter Egg with pictures of the event.

Pentagon Thief (Yuri) Reference
In the Intro Cutscene for the map, the Pentagon Thief (Yuri) can be seen during explaining why he is not present in the Classified Remake. He was originally present in the map Five as a special round boss that the player had to deal with.

Dempsey's Whistle is the
Moon Loading Screen Song
(Samantha's Lullaby)
When the player has activated all the Punch Cards they can then return to 'Groom Lake' and throw a grenade at Hanger 4. This will trigger some quotes from Ultimis Dempsey. During one of these quotes he will begin to whistle the Moon Loading Screen Song (Samantha's Lullaby).
Baby Gun (31-79 JGB215) Reference
In the Intro Cutscene for the map while in Shangri La Ultimis Dempsey can be seen with the Baby Gun (31-79 JGB215). He shoots it while the crew are teleporting and as a result send them to the wrong location.

Roebuck Reference
In one of the Film Reels Robert Mcnamara mentions handing files over to a man named Roebuck. Roebuck is one of the main characters from the Call of Duty World at War campaign. He is also featured in the map Five as a portrait on the wall.

Creepy Portrait
If the player stands at a certain angle in the 'Side Passageway' and looks at the torn picture hanging on the wall next to the metal detector, they will see that it looks as though the picture is watching the player. This can be unnerving for some players.
K Symbol
In the 'Upstairs War Room' walkway inside a zombie barrier, on a noticeboard on the wall, the player can see a torn piece of paper with a K symbol on it. This was also present on the map Five.

Squealing Pig
Down in the 'Labs' in the 'Porcine Research' room the player can find a Pig hung up squealing. This is how the Nova Crawler enemies are made.
Test Subjects
Down in the 'Labs' there are many test subjects that are being experimented on, both humans and pigs. Just outside the 'Weapon Testing' room outside the zombie barrier, there are multiple test subject containers at the back of the room with little windows that show a face inside them. These are also present on both Five and Kino der Toten as well.

Possible Reference to Atlantis
In the 'Lower War Room' there is a board of the world map with locations marked on it. One of the marked spots is possibly pointing to a possible Zombie outbreak in an Atlantis map.
Blueprints
There are multiple Blueprints scattered around the map.


Samantha's Written Texts
There are multiple story texts written by Samantha on the walls depicting events. These can be found in 'Porcine Research', 'Morgue' and 'Upper War Room' (notice board).


Samantha Groom Lake Quotes
The player must be playing as Ultimis Richtofen to be able to hear these quotes. If the player heads to 'Groom Lake' and plays in there, then during the waves Samantha will have specific quotes that she says to Ultimis Richtofen.
To be added soon!
Documents and Ciphers
The player can find multiple Documents and Ciphers scattered around the map which give more story insight.
To be added soon!
Audio Reels
The player can find multiple Audio Reels scattered around the map which give more story insight.

To be added soon!
Film Reels
The player can find multiple Film Reels scattered around the map which give more story insight. Each time the player picks up an audio reel they will need to head to the reel player in the 'Morgue' and interact with it to hear it.

To be added soon!
Punch Cards/Ultimis Dempsey Quotes
To begin this the player must first Pack a Punch a weapon and have the Kill-O-Watt modifier on their weapon. They will also need to head to 'Weapon Testing' and pick up the server battery from the open metal cabinet next to the workbench. Once done the player will need to take the battery to 'Server Room' and place it in the machine with the open panel. Once done they will need to shoot the battery with their Kill-O-Watt weapon until all the little lights on the server turn green. Once done the panel will close and the player will have powered on the server. The player will then need to collect all the Punch Cards scattered around the map and then, when they return to the 'Server Room', they can insert them into the terminal in the centre of the room to listen to the story quotes.
When the player has listened to all the Punch Cards they can then head to 'Groom Lake' and if they throw a grenade at Hanger 4 they will hear some quotes from Ultimis Dempsey.

To be added soon!
Red Phones
To begin this the player must first Pack a Punch a weapon and have the Kill-O-Watt modifier on their weapon. Once they have this if they shoot the 3 Red Phones around the map they will hear story messages from Samuel Stuhlinger, Samantha and Dr Maxis. The Red Phones are located in 'Side Passageway', 'Panic Room' and the 'Power Room'.

If you require a video guide then the video below will show you how to activate the Red Phones.
This video is provided by MrDalekJD.
Samantha Wisps
The player can only hear a wisp that is specific to the character they are playing as in the game. For example if the player is playing as Dempsey then they will only be able to hear the wisp for Dempsey in that game they are playing.
There are 4 wisps - one for each character. The wisps are yellow orbs and are in the following locations. Takeo's wisp is located outside the 'Weapon Testing' room outside the zombie barrier next to the metal cabinets, Dempsey's wisp is located in 'Weapon Testing' outside the zombie barrier on the metal trolley, Nikolai 's Wisp is located in the 'Morgue' in the small office on the bottom shelf on the Nova 6 container rack and Richtofen's wisp is located in the 'Porcine Research' room at the back of the room outside the zombie barrier behind a desk.

If you require a video guide then the video below will show you how to activate the Samantha Wisps.
This video is provided by MrDalekJD.
Cold War Remedy (Project Skadi)
This is the Main Easter Egg Quest for the map. The player must choose the Grenades as their lethal before starting the game. It is advised that the player has turned on the Power and accessed Pack a Punch. Guides for these can be found above.
Step 1: Key/Numbered Pictures
To start the Easter Egg Quest the player will need to obtain the Key. The Key can be found in the 'Lower War Room' on the opposite side of the wall to the Cola Perk machine, inside a metal key container box. The Key is obvious from the others as it is longer and has a round end.

Once the player has the key they will need to head up to the 'Mail Offices' and interact with the desk with a key lock on it in the centre of the room. When done the desk drawer will open up and reveal a picture with a 4 digit number on it. The player will need to note this number down and also the picture that went with that number. Bear in mind that this number is random every game.
The next numbered picture can be found down in the 'Labs'. The player will need to head over to the zombie barrier just outside of the 'Weapon Testing' room. They will then need to cock a grenade and throw it at the prototype teleporter at the back of the room. Once done a picture will pop out of the wall to the right of the zombie barrier. Once again the player will need to note down the number and the picture that went with the number.
The next numbered picture is found in the 'Panic Room'. In order to access the 'Panic Room' to obtain this number, the Defcon switches must be pulled down in a specific order. The 1st switch to pull is on the 'Upper War Room' level at the back of the room next to the giant screen, the 2nd switch is in the 'Server Room' on the left hand wall, the 3rd switch is the other switch on the 'Upper War Room' level that the player hasn't already pulled and the 4th switch is on the 'Lower War Room' level to the left of the elevator on the wall. Once all the switches are pulled the player will need to jump into the portal in the centre of the room. This will take them to the 'Panic Room' and once inside they will need to head over to the TVs in the wall on the left and look for the TV with the white scratch marks under it. Once the player interacts with the TV it will then push the TV back and reveal the image and number. Once again the player will need to note down the number and the picture that went with the number.
Before the player can obtain the last numbered picture they will need to have Pack a Punched a weapon. Once they have done so they need to head to the 'Deserted Hallway' and shoot at 4 portraits' gold plates in a specific order. The image below shows the order to shoot the gold plates in.

Once all the gold plates are shot in the correct order the 1 gold plate will open up and reveal the last numbered picture. Once again the player needs to note down the number and the picture that went with the number.
Step 2: Number Pad Machine
Once all 4 numbered pictures are found, the player needs to head down to the 'Lower War Room' level and come over to the giant terminal with a screen and number pad on it. The player then needs to input the the numbers they got from the numbered pictures into the number pad in a specific order. To input a number, the player will need to shoot the specific number into the number pad and then confirm the number. The order in which to input the numbers is as follows by the pictures 1. Shi No Numa, 2. Der Riese, 3.Shangri La, 4. Kino der Toten. Each time the player inputs a number into the number pad, the image on the screen will change. When the last number is input, the screen will display a message saying 'Project Skadi received'.
Step 3: Collecting Project Skadi
(Winter's Howl)
The player now needs to head over to 'Groom Lake' and once there, if not done so already, the player needs to remove the 1st debris. If not removed they will need to stay at 'Groom Lake' for 3 full rounds. When the debris is gone the player will see that near the back is a red container with a metal chilled case on top of it. The player needs to interact with the case and this will open up the case and reward them with the Winter's Howl wonder weapon for free. Once the player picks up the Winter's Howl they will be rewarded with the 'Cold War Remedy' achievement or trophy. The player can also Pack a Punch the Winter's Howl to the Winter's Fury.
If playing co-op only 1 player can pick up the Winter's Howl and the person who picks it up will get the achievement or trophy but the other players will not be rewarded for this unless they do it is a different game and they pick up the Winter's Howl.


If you require a video guide then the video below will show you how to complete the 'Cold War Remedy' (Project Skadi) Easter Egg Quest.
This video is provided by JokerAlex 21.
Round 150 Ending Cutscene
If the player reaches round 150 they will unlock a special ending cutscene. This is very difficult and time consuming to do and only recommended for experienced players.
If you require a video guide then the video below shows you multiple tips on how to get to round 150 more easily. It also has the entire ending cutscene included.
This video is provided by MysteryHQ.
Scrapped Hidden Super Easter Egg
Room
There were plans to have a super secret on most of the Black Ops 4 Zombies maps. This however, was a scrapped Easter Egg and as a result is not accessible in game by normal means. However, on the PC version of the game it has been made possible to at least gain access to these rooms now.
This video by MrDalekJD showcases the scrapped Classified Hidden Room.
Also credit to Serious for making this possible to be able to do in game.